

Its been almost 6 years since I registered on the forum, but finally l got a TL. A friend of a friend had a 1998 model, that had been sitting for years, outside under a tarp.
He had no intention of getting it running and in the condition it was it would be impossible to sell, so he gave it to me for free!
Obviously there were issues, it had been sitting with almost no gas, so the tank was full of rust, tires cracked etc.
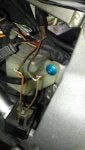
Will post pictures once I get her running, which I am struggling with at the moment.
Since I had it I've done the following:
- Changed oil, oil filter and spark plugs
- Treated and sealed the rusty tank
- Changed the fuel pump and mounted the fuel filter outside the tank
- New battery
- Check error codes in dealer mode = c00 - NO FAULT
The bike has done bout 18000miles/30000km.
But the bike won't start, the fuel pump fires up, the external filter fills up with gas, but nothing happens, just keep churning ...
Any suggestions?
Thanks
A video:
He had no intention of getting it running and in the condition it was it would be impossible to sell, so he gave it to me for free!
Obviously there were issues, it had been sitting with almost no gas, so the tank was full of rust, tires cracked etc.
Will post pictures once I get her running, which I am struggling with at the moment.
Since I had it I've done the following:
- Changed oil, oil filter and spark plugs
- Treated and sealed the rusty tank
- Changed the fuel pump and mounted the fuel filter outside the tank
- New battery
- Check error codes in dealer mode = c00 - NO FAULT
The bike has done bout 18000miles/30000km.
But the bike won't start, the fuel pump fires up, the external filter fills up with gas, but nothing happens, just keep churning ...
Any suggestions?
Thanks
A video:


")


